
FINALLY! Boat House Bath Reveal
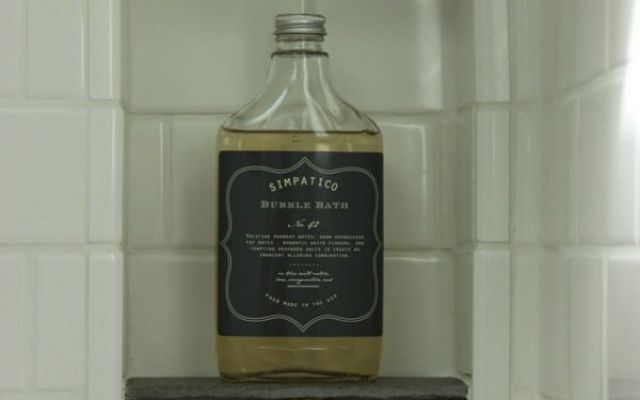


I am so happy to finally share the final pictures of Bathroom No. 2! It took a little longer than I had anticipated, greatly because I did a lot of the work myself. Which is why the bottle of bubble bath is half empty in the photos.
This remodel was the result of an ongoing leak in the roof, and was it ever ONGOING. For a few years, it drove me crazy. I was trying to trouble shoot the leak without having to tear the walls open and expose the interior to mold as my son is allergic before we knew what we were in for. Over the years, I had three different people out to make recommendations, one found a leak and caulked it closed but later I discovered it wasn't “the leak”. THE LEAK ruining the walls, the floor, my immediate life. My problems still weren't solved, down came more rain as more violent storms hit. One day, it came through the roof and to the interior exhaust fan, and into the toilet. I remember the afternoon when I was alone in the house and I thought I heard someone using the toilet (I swore I heard peeing in a toilet , forgive me). I ran to the room, and there she was, mother nature was doing her business through my roof and miraculously into the toilet. How nice.
A Realtor friend of mine recommended Mr. Wonderful. I call him that because he has certainly earned his name. His real name is Walt Dotson of Ask A Contractor. Collectively we thought since the weather was drying out, it was best to tear back the shingles and take a closer look. I was D-O-N-E, I was ready to tear it off. He did. Walt discovered that in the skylights we had replaced as part of our inspection process, had bad flashing surrounding, if one could even call it that, it resembled flashing. More like an attempt to be flashing. So, I now know that when we paid some guy hired through our Real Estate Agent and inspector (don’t get me started) the skylight glass was replaced, but I now know nothing else was inspected. (WARNING *SOAP BOX MOMENT* People: Please be aware that when a skylight is leaking, it is 99.9% likely that it is the flashing, not a crack in the glass skylight. Unless a thick beaked bird plummets at mach-5 speed directly into your skylight, should it be a leak from the actual glass pane. Pardon my sarcasm, but if I had to do this all over again, I would have been on that roof doing some hovering. I should have challenged everyone involved-but I didn't, I trusted someone I shouldn't have. Shame on me. When you get an answer,just get 3 more. OK, stepping down. Let’s thank Walt, shall we?
Thanks to Walt, there won't be another leak in bathroom. Walt had new flashing made customized to fit our skylights the right way. He fixed the roof in a few days, luckily before more rain came. A major storm hit just a few days later (the kind of storm where rain falls horizontally) and n o t a s i n g l e d r i p . The next morning I get a call, and it's Walt. He says "anything?", "not a drip" I said. Walt is a contractor who cares enough to call first thing in the morning before you even remember to look. His prices are always reasonable, and he is honest and hard-working. Thanks Walt for making this nightmare go away and giving us a beautiful bathroom!!
On to the fun stuff, but first, let’s talk about things that needed to change in this bathroom.
IT WAS MEAN.
The footprint was to stay the same, but we needed to change out the floor as it had been damaged over time due to water leakage, the blue laminate floor had bubbled up as a result. The drywall had a few holes in it from caving in and from me peeking inside, it had also started to leak near the electical switch which is dangerous. The tub was a 25 year old disgusting yellowing jetted tub that not only spit out air but bits of mold, even with constant rinsing. My son is allergic to mold and suffers from terrible eczema; I had a hunch this was contributing to his outbreaks. I couldn't wait to yank this thing out! It was also so high, the deck of this old tub measured 23 inches, my poor kids practically had to get a running start to get in!
The only outlet was to the left of the sink so when little E starts blow drying her own goldie locks, she doesn’t have room to safely set the blow dryer on the counter. The cord has to cross the sink space to set it down or she will be tempted (like I do-tsk tsk) in the sink bowl. Now, I know not to turn the water on, but you can never be too safe with the littles. So, I moved the outlet to the far right of the sink, where there is more counter space. Our sink it off set to the left side, if our counter were any larger, I would suggest centering the sink.
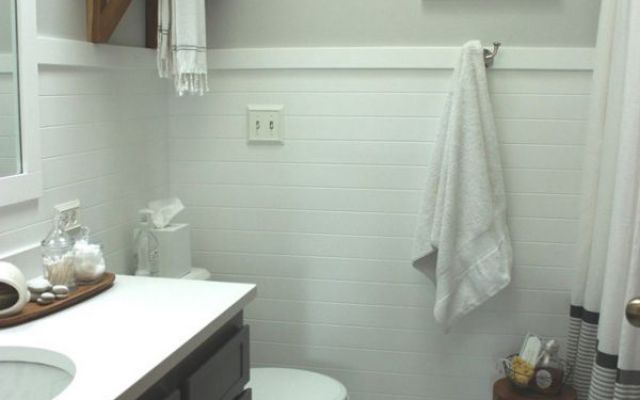
Another electrical item that that had to change was the shower light and fan switch. They were originally placed in the middle of the wall….pause…where do you put the towel bar?…It leaves us with the option to place it by the toilet, right? OK, who out there, after taking a bath would like a fresh towel sprinkled with urine? Ewe right? NOT ME, and not my kids. The switches were moved to the far left, giving up space to place a double towel hook. I cannot stress the importance of “living through the design” enough, the function, before beginning any remodel project. These little things seem little, but make a space function at its best and can make a significant change in everyday living.
IT WAS UGLY.
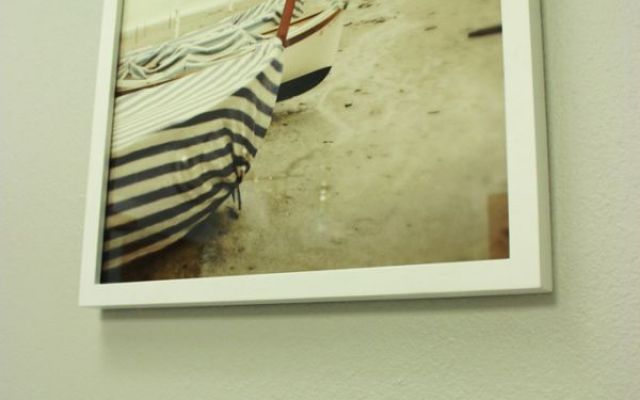
This is my kids' bath, my son (6) and daughter (4) share this tiny space, so I wanted a gender neutral and a light boathouse kind of feel that wasn't too kiddish. No little rubber ducks or fish, or under-the-sea shower curtains, okay maybe one rubber duck.
On the cove walls were decent square 4 inch white field tile, but a hacienda style Mexican floral deco tile adorned three of the walls in circles-ick! I could have been satisfied with the 4 inch field tiles, but they had a texture I couldn't match and they didn't make the tiles any more. So it was decided to yank it with the tub and now was the time.
I was tempted to get a new vanity, there are a few nice ones out there that come with a counter included. They are free standing, however, the cabinet I had was a custom built-in and made of sturdy oak. I would hate to rip it out. Even though the cabinet faces were flat, I knew Donna at Fretworks Designs could create a shaker styled veneer I could affix to the surface which would change the entire look. So, I opted to turn to Donna so I could splurge on my counter top. I sanded real well, and put multiple coats of Valpar’s Ultra Kitchen and Bath low-sheen paint with primer to fill as much grain line as I could.
The shaker style veneers were custom made (sized to my cabinet fronts) 1/4 inch MDF which are flat (no grain line) going over wood. Since, I didn’t want too much difference there I went with a dark color, so it isn’t that noticeable. This paint is GREAT, it’s is scrub-able, low to no VOC (it smells and has low VOC’s which have proven to can cause cancer), they are mold and mildew resistant, and you know how I feel about that! I highly recommend it, no more do you have to choose a stinky high enamel, high sheen gloppy paint for your kitchen and bath surfaces. Hooray! However, it’s pretty thick as it includes primer. I gave the cabinets a good sanding to work down the lines and ensure paint adhesion. I also added a product called FLOETROL, which is a self leveling paint additive. Read more about it here. Generally, it helps to avoid roller and brush marks to achieve get a beautiful professional finish. It’s a wonderful product, really. I was concerned that this additive would inhibit the scrub-able factor, but I can say with confidence, it doesn’t. I used it in my powder bath, and it is slick!
Counters… I absolutely did not want cultured marble or a drop-in sink. An undermount sink was a priority with some sort of engineered stone or granite as the counter surface. So shopping for a remnant at various suppliers I went. I searched for about 4 weeks and knew I had to be open-minded since little remnants in white go fast. I only needed 44 inches worth of counter, and I didn't want to pay for a whole slab. Well, my friends at Alpha Stoneworks did it again. They just so happened to have a remnant in all white Caeasar stone's "Blizzard" No. 2141, a designer favorite, available. I grabbed it. Although I love marble, I would never put it in a bath with kids, or with my kids anyway. Think blue sparkly toothpaste!! It's just not for us, I needed something really resilient, wipe-able, and clean looking. Solid surface isn't cheap, after material and cutting labor, even a little slab like this will set you back around $500. A new vanity of this size was around $600 plus shipping and the labor and demo to get it out and new in, plus the extra tile to run underneath, etc. I opted for the slick new top and really happy I did.
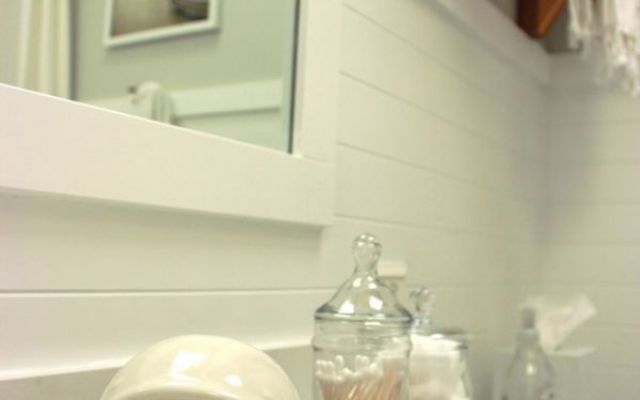
We ran the bead board horizontally to widen the space, and stopped at about 3/4 up the wall. Originally I wanted to go all the way up plus the ceiling with the board, but we discovered our walls were really off (not square) and the lines not lining up were going to make it look really obvious, so we stopped it where we felt comfortable. I painted the tops of the walls and ceiling in Valspar’s Seashell Gray . You know that Ad where a woman walks into an office ( think it’s Kohler) and takes a faucet out of her purse and places it on her Architect’s desk and says, “build a house around this”. (I love that ad, it's something I would do!). The reason I mention the Ad is becuase my inspiration for the paint, was a rock. I wanted it the color of those white beach rocks –think Something’s Got to Give- the white beach rocks that Ericka collected. Yep, I too have collections of those, because I just loved the chalky color of them. It’s very slight, and Valspar’s Seashell Grey as it so happened, to be called, was a perfect match.
The floor tile I chose was a 2 inch hexagon porcelain tile form The Tile Shop. It appears to be a bigger tile in photos because of the angle, but it really is a small 2 inch tile. I didn’t want a .75 inch tile, smaller tiles mean less face and more grout lines and I didn’t want to go that vintage looking nor did I want all that grout.
Speaking of grout, I always wanted a dark grouted floor. To get this look, we mixed two grey grout powders purchased from Lowe. With a few dozen popsicle sticks, plastic cups and a hair dryer we started playing with grout colors. One bag was too platinum and the other too dark that in time, would appear black. The two together (I recall it was three parts dark to one part light) made the perfect grey; not too platinum, not too charcoal blue. (Walt was so patient with me!!! Thank you!!) The tiles are on a mesh so installing these is fairly easy. The tricky part is to align every single angle as you press it into the mortar. If not, the irregularity of the pattern will stand out. Walt and I were really picky about this so we made sure we got it right before curing. Sure mesh is easy, until it was realized that we Walt had to cut every little tile in front of the tub and walls. That took some time.
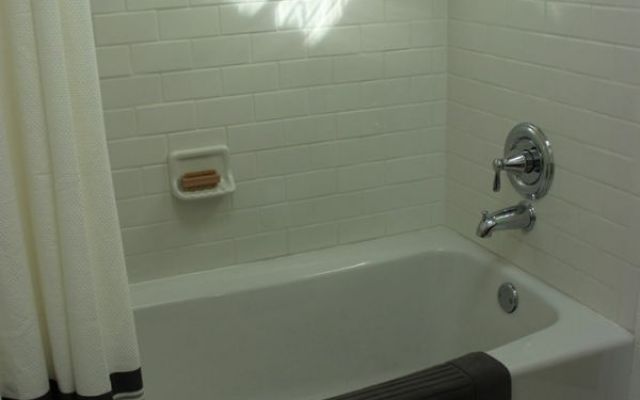
Shower/bath cove wall tile. I chose, of course, white 6 x 3 subway tile and put every one in with my little hands. OY!!! I lived in that tub (that beautiful white tub) for 4 days and three long nights! I bought a basic tile from Lowes, which was only 22 cents per tile, really economical. I read a lot of reviews about how all the whites of subway tiles are so different, grey vs. cream, vs. blueish white, there is a slight difference in the subway tiles from Home Depot vs. Lowes. It’s slight. To me, when all the surfaces reflect off one another, white is white. But for all of you picky Nancy’s out there, and for the tiles that may butt up to ones another, you may want to know that the Home Depot Tile is creamier (to my eye anyway, but you are always free to argue with me).
I measured and set the tiles while Walt cut them. This saved us a lot of time. Having so much time (ha!) allowed for some more brainstorming. Next, I wanted a shower niche! My kids would LOVE a shower niche right? I looked on Pinterest for inspiration, and really just wanted something simple, enough space for two shampoo bottles. I don’t remember how we came up with this (maybe it was on Pinterest), but I got the idea to make it a double shelf so we could place either soap, foot brushes (for those little dirty toes) or you know, my daughter's plastic mermaids to perch upon. I bought a single slate looking porcelain tile and cut to slide it right in on top of the bottom niche tile. I also made the bottom of the niche that same tile. Who wants soap scum build up in a grount line? Have you ever noticd that when you set a slimy bar of soap on tile that it sliiiiiides. That annoys me, (I know what you're thinking right, my poor husband. Rest assurred he is annoyed by a thousand more things than I am). Onward....the thickness of the tile happened to be the exact grout line space so it slid right in-with a little push, that is. It worked and we love it. I had the unfinished rough side of the tile facing outward for some natural looking interest. Cutting all of those liner bars and tiles was not easy. Ask Walt, I can’t take credit for it, but I did map out all of the lines! Don’t forget to waterproof the cove before installing the tile to protect against any sitting water. I had the niche positioned here because I liked it there, the framing happened to lend itself to this location, it was the right height for a child or adult and it was out of the way of the direct spray so standing water is less likely to collect here. Yes, I think through everything, it is exhausting to be in my brain sometimes.
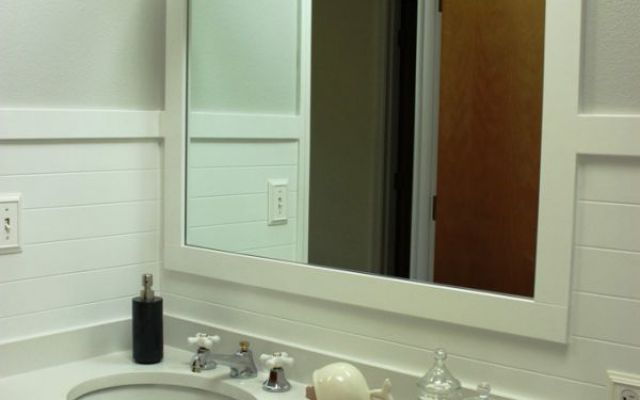
The Mirror. Besides the niche, it's one of my favorite features. It’ a simple, low budget built-in, custom look. I bought a basic contractors 30 x 40 inch mirror and used adhesive to affix to the wall. After it set, Walt framed it with our 3 inch bead board “chair rail” trim. I had a photo from a magazine for years with something similar to this (although with vessel sinks and the faucets coming out of the wall-it was spectacular!) Vessel sinks and kids aren’t a best pairing though, and that configuration called for plumbing reroute, which = $$$$.
The reason I liked it was not only that it looked custom, it lifted the mirror up from the vanity surface and exposed the cool bead board. Also, when the mirror is a up and away from the counter, it doesn’t reflect the clutter on the counter. It’s low enough so my kids can still see their faces (with the help of their step stool). At the rate they are growing they won’t need this stool for long!
As a THANKS for reading my long blog, I am giving all of these resources away to you. I'd REALLY appreciate a "like" in return. I hope that I have inspired you to out a little elbow grease into your bathroom renovation. Send me some photos if so!
If you are local and need a GREAT Contractor, here is a direct link to Mr. Walt Dotson of Ask a Contractor.
WHERE TO GET THE PRETTY THINGS...just click on each item listed and it will take you "where to buy". You are welcome.
Vanity Cupboard door shaker veneers- custom
Vanity Paint Color- Valspar “Man Cave”
Sink – Kohler
OTHER PRETTY THINGS...
Bamboo Wood tray-Target - (look in the kitchen section)
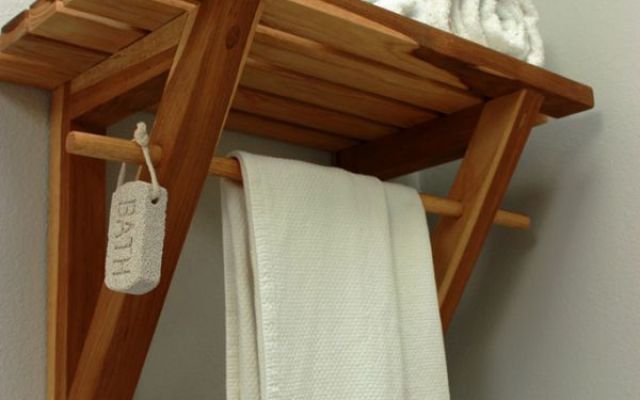
BATH pumice stone and sea sponge on a rope-Cost Plus World Market
Grey Bath Mat-Threshold Brand at Target (matches Valspar's "Man Cave" paint color perfectly).
Light Fixtures, Marth Stewart via Home Depot Seal Harbor.
White Planter on shelf –IKEA
Tissue Box Cover-West Elm
Pretty soaps and lotions are from Barr Company from a local boutique
*All Photos are property of DE LAVENNE DESIGN LLC. Please don’t take or copy without asking. Thanks!
Comments

My name is Kari de Lavenne. I love light airy beautiful interiors, striking photography and a good pair of sneakers.
Follow me on Instagram, Pinterest and Facebook:
THE BLOG
MASTER REVEALS
May 15, 2018
Visiting the 30 A
May 20, 2016
WOOF
Apr 28, 2016
MOM Magazine Feature
Apr 07, 2016
Hurray we're live!
Apr 03, 2016